

This is the first post in my Containerizing NServiceBus Endpoints with Docker Series
Part 1: Introduction/Readying your System/Local Azure Resources
Part 2: Live Azure Resources
Part 3: Dockerize!
Part 4: Docker Compose
Part 5: Containerizing Sql Server and switching to Sql Persistence
Docker. Containerization. Microservices.
You can't go anywhere or read anything today without hearing about the "disruption" of containerization. Most of the time, Docker is at the forefront of that conversation. Microservices is the "other new thing". There is a lot being written about microservices, and unfortunately, it's often conflated with containerization even though the two are not mutually inclusive.
Apparently everyone in the world using containerization but me (at least it feels that way), and since I don't get to work with containerization on a day-to-day basis, it's on me to learn. However, what I lack in containerization knowledge, I make up for in microservices knowledge. I am working with microservices everyday via a solution based on SOA using NServiceBus.
So, I've decided to combine my knowledge of microservices and NServiceBus with my weakest skill set, containerization, by containerizing a simple NServiceBus application using Docker. After making my way through some Pluralsight training, I picked up Elton Stoneman's book, "Docker on Windows" and learned a LOT in the first two chapters.
When I had reached the end of the second chapter, I felt I had enough rudimentary knowledge to start "hacking" away at Docker to see if I could get an NServiceBus endpoint running in a Docker container.
This is Not an "Introduction to Docker"
If you've never used Docker before, I suggest you stop here. Some rudimentary Docker knowledge will be required. Although I move slowly through the Docker examples below and explain any Docker commands I'm using in full, it's only a subset of the basics, and could leave you lost or frustrated when you hit a snag.
I suggest the following resources to get up an running with Docker:
- Docker Deep Dive
- Introduction to Docker on Windows with Visual Studio 2017
- Docker on Windows
- and my personal favorite, Understanding Docker without losing your shit
Goals
To keep myself from going down the Docker "rabbit hole" or getting too hung up on "DevOps stuff" , I had to set goals for myself so I could make some type of progress. Not being a DevOps guy, not knowing much about application deployments and having next to no Powershell experience, it would be easy for me to get hung up on insignificant details.
Keep the Solution Simple
- I decided to use a Visual Studio 2017 solution that consisted of two projects; an MVC website that was configured as a send-only endpoint, and a single endpoint running as a windows service using the NServiceBus host.
- I would dispatch one command from the website's HomeController that would be handled by one endpoint. No Sagas, no pub/sub, no Events. Just send one command.
- the handler would only log that it received the command. No databases, no caches ... simple.
- because I work with .NET 4.6.1 every day, I decided to keep the the solution grounded in that framework instead of trying out .NET Core.
- I wanted to be able to run the solution locally without using containers. This keeps the "F5" developer experience intact. When ready to run the solution in containers, I'll manually build the images and then run the containers I needed without relying on IDE magic.
Dockerize an NServiceBus Endpoint With the Least Amount of Work Possible
- to minimize the work I had to do, I wanted to minimize the NServiceBus infrastructure I had to install and configure in the container hosting the endpoint.
- this meant "offloading" the installation and configuration of NServiceBus's persistence and transport mechanisms to existing services that were already installed, configured and ready to go.
- I did this by utilizing Azure (I knew this cloud thing would eventually come in handy!). I used Azure Storage Queues for the transport and Azure Storage (Tables/Blobs) for persistence.
Trade-offs/Limitations
As a result of my goals, my first pass at learning Docker has imposed limitations and trade-offs.
- my Dockerfiles, the way I'm building images and running containers from those images are most likely sophomoric because I'm not using Docker Compose or multi-stage builds (I do plan to eventually move in that direction).
- I am not using volumes, so any data that is NOT residing in Azure Storage (like NServiceBus logs) will be lost when the container(s) are stopped.
- running the solution in containers requires an Azure subscription. Why? I did not try install the Azure Storage Emulator as part of the Docker images. Doing that would have added complexity I did not want at this stage.
- because I have very little experience with packaging applications for deployments, I am most likely copying too many files/the wrong type of files into the containers. I will slowly "prune" these files down to the minimum needed to add to the container for the application to run
Okay, with all that out of the way, let's get started!
Readying Your System
Microsoft Azure Storage Emulator and Microsoft Azure Storage Explorer
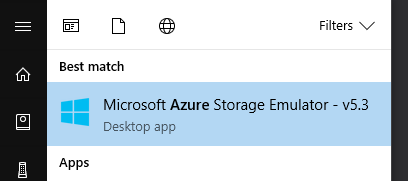
Before downloading the source code, you need to fist download and install the Microsoft Azure Storage Emulator here.
Why? The solution's configuration by default will attempt to use the emulator instead of Azure itself. It simplifies the "F5" experience and allows you to get familiar with the solution without all the "pomp and circumstance" of setting up Azure resources via the portal.
Next, download and install Microsoft Azure Storage Explorer here.
This step is optional because you can also use Visual Studio's Cloud Explorer to get the same "view" of your storage accounts , I found Azure Storage Explorer's UI much more user friendly and a bit easier to read and work with.
Get the Code
I've uploaded the solution (complete with Dockerfiles) to GitHub here:
https://github.com/mgmccarthy/NSB6SelfHostedClientMVCAzureTransportAndPersistence
Clone or download the code.
Open and Run the Solution
Opening the solution and you'll see three projects:

- ClientMVC: an MVC website which contains a send-only endpoint to send a command from HomeController
- ClientMVC.Handler: the NServiceBus endpoint which has handles a TestCommand message via the TestCommandHandler handler.
- ClientMVC.Messages: a shared library that contains the command class
First, start Azure Storage Emulator:
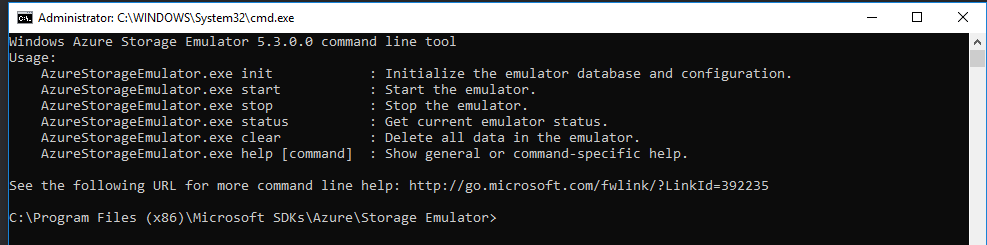
once started, you should see a console windows appear showing the emulator is up and running:
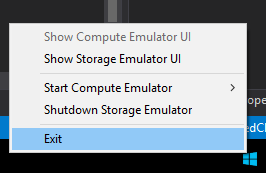
you'll should also see the emulator running as a service in the bottom right of your task bar:
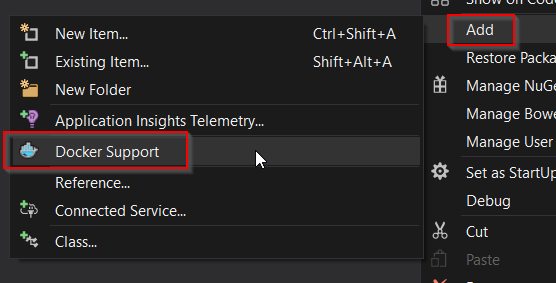
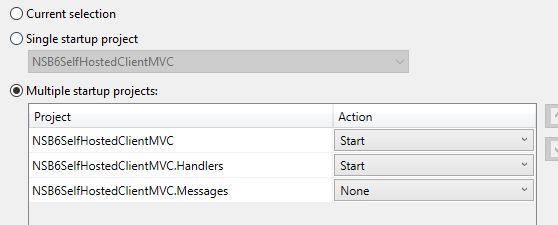
Next, right-click on the solution in Visual Studio and choose "Start" for both the ClientMVC and ClientMVC.Handlers projects:
Hit "F5" to run the solution.
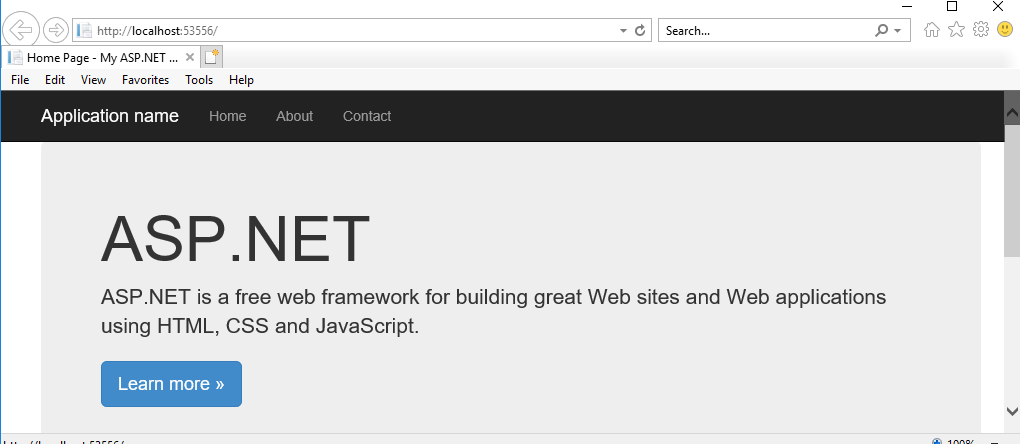
You should see a browser window open and an NServiceBus console open. When the browser opens, it follows the default MVC routing to HomeController/Index which sends the command and shows the "generic" MVC project page.
The NServiceBus console window should eventually read the TestCommandHandler handled the TestCommand and the UTC time at which is was handled:
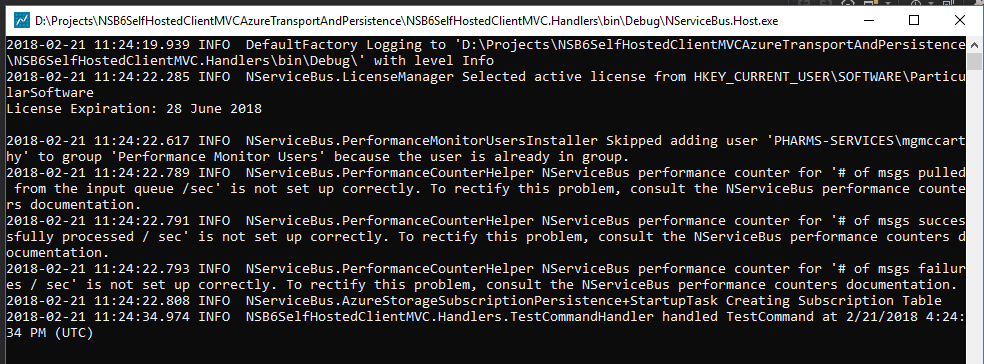
Why eventually? When the command is sent, it's sent with a delayed delivery of 10 seconds.
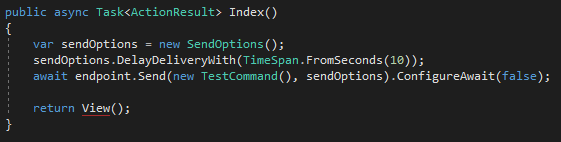
The reason I did this is to demonstrate how utilizing delayed delivery translates into Azure resources created to handle the delayed delivery.
Open Azure Storage Explorer
To see the Azure resources created as a result of using Azure Storage for both the transport and persistence mechanisms for NServiceBus, open Azure Storage Explorer and navigate to:
(Local and Attached) -> Storage Accounts -> Development
then open Blob Containers, Queues, and Tables. You should see a view that is very similar to this:
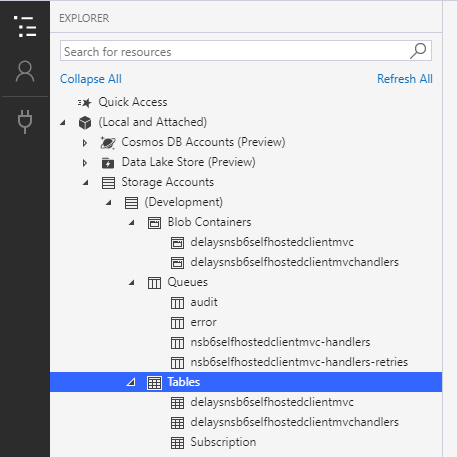
Without getting into too much detail, the Queues section contains the Azure Storage Queues created and used by NServiceBus for its transport functionality. Earlier, I mentioned the resources that will be created for delayed delivery. Both the Blob Containers and Tables section contain those resources.
I choose to override the default naming of the delayed delivery table so it is easier to identify which tables/blobs belong to which endpoint.

So how did NServiceBus know how to hook into Local Azure Storage for both its transport and persistence needs? Looking at either the Global.asax file in the MVC project or the Endpoint.Config file in the Handlers project, you'll see code like this:

by hard-coding UseDevelopmentStorage=true as the connectionString, we're telling NServiceBus we expect to find local Azure Storage available to handle its transport and persistence needs.
In Part 2, we'll change from using local Azure storage to using a real Azure Storage account set up using the Azure portal.