

photo by Viktor Talashuk from Pexels
Originally published for Afterman Software
Posts in this Series:
- Part 1: Endpoint Implementation
- Part 2: Deploy with Visual Studio Publish (this post)
- Part 3: Pulling Back the Curtain on Visual Studio Publish
- Part 4: Build and Deploy with Azure DevOps
In the last post we coded an NServiceBus endpoint running in a hosted service in the .NET Core generic host. We ran the endpoint locally and saw its log output written to the console. Now that we have an endpoint, how do we deploy it to an Azure App Service?
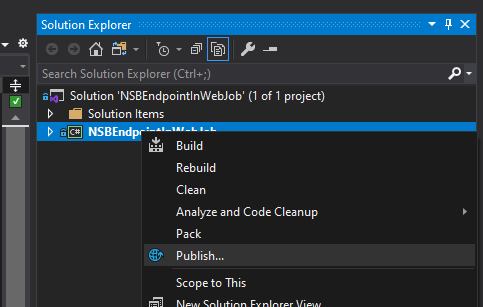
Like all things in life, when in doubt, right-click! More specifically, right-click, Publish.
In this post, we'll be deploying our NServiceBus endpoint to Azure using Visual Studio Publish.
Getting the Code
Unlike Part 1, where you could download the project and run it, this post will require you to follow along with me as the Azure resources required to run the endpoint are created by Visual Studio Publish.
Downloading the code we completed in Part 1 is a good starting point for this post.
If you haven't set up and Azure account yet, now is the time to do so. This post, and all subsequent posts in the series require an Azure account.
And We're Off...
With the solution open, right-click the NSBEndpointInWebJob project and choose "Publish"
You'll be presented with a "Pick a publish target" window with "Azure WebJobs" pre-selected in the left pane. Keeping the default of "Create New", click the Create Profile button.
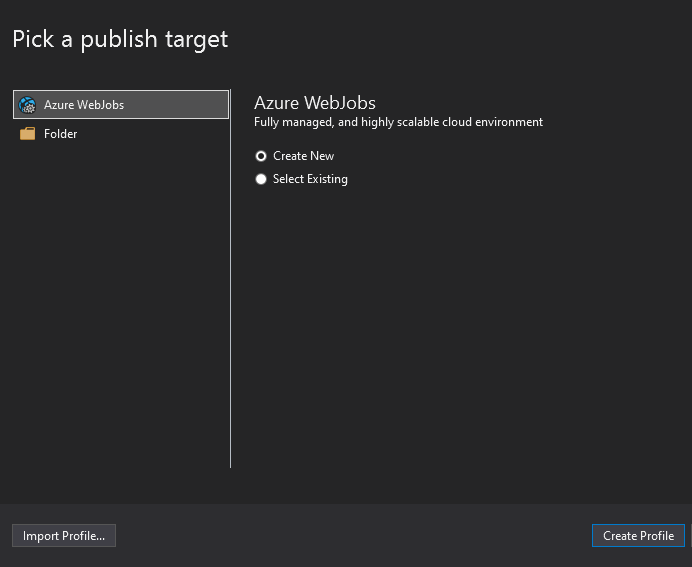
You'll be presented with the "App Service Create new" window

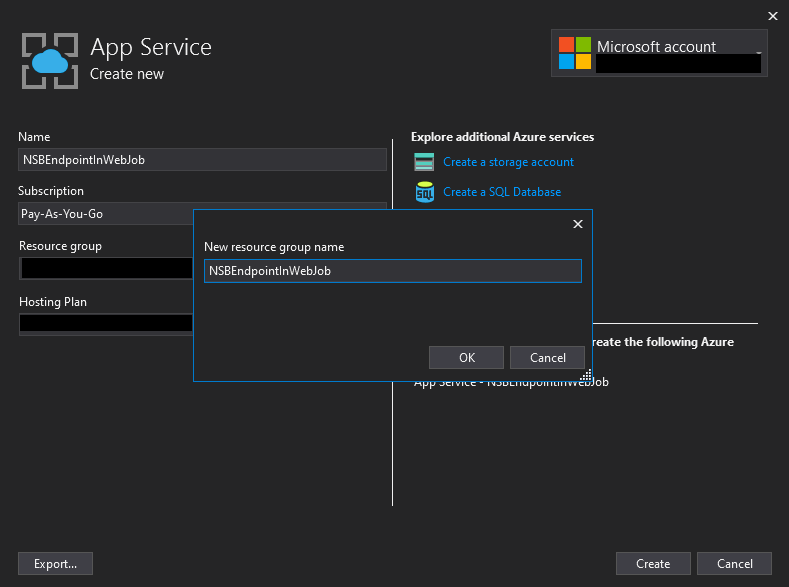
Type the name of your app service (it must be globally unique) in the Name field. I named my app service "NSBEndpointInWebJob". Then choose your subscription from the Subscription drop down.
Provision Azure Resources
DISCLAIMER: the next three steps are all going to allocate live Azure resources in the cloud, which, based on your subscription, could cost money. Read the "Cleaning Up" part of this tutorial so you don't get any surprises on your monthly bill
Click the "New..." link next to the Resource group drop down. This will open the "New resource group name" window. Type "NSBEndpointInWebJob" for the Resource Group Name and then click "OK".
Click the "New..." link next to the "Hosting Plan" drop down. This will open the "Hosting Plan Create new" window. In this window
- Type in "NSBEndpointInWebJob" in the Hosting Plan field
- Change the Location to the Azure Region that is closest to you (for me, it's "East US")
- Change the Size drop down from the default option of "S1" to "B1"
You window should look similar to this
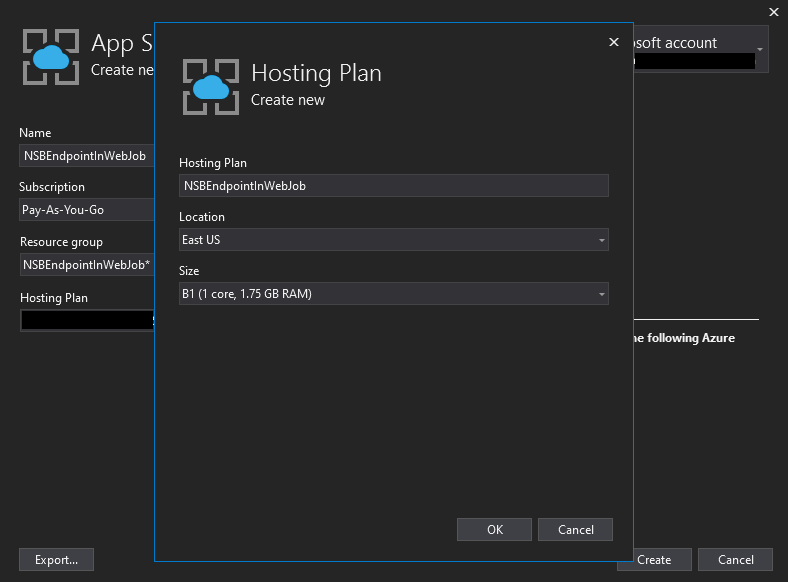
Azure App Service plans have many pricing tiers, the cheapest of which is the "F1" tier, which is free. However, we cannot pick free for the pricing tier as the Azure App Service we're going to host our endpoint in needs to run in "Always On" mode. This requires the "B1" pricing tier or higher.
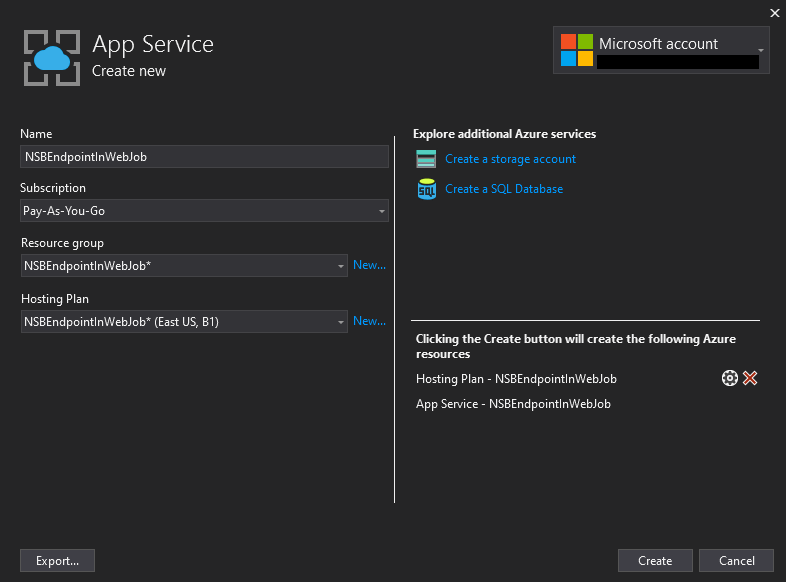
Click OK to close the "Hosting Plan Create new" window. Your "App Service Create new" window should now look like this
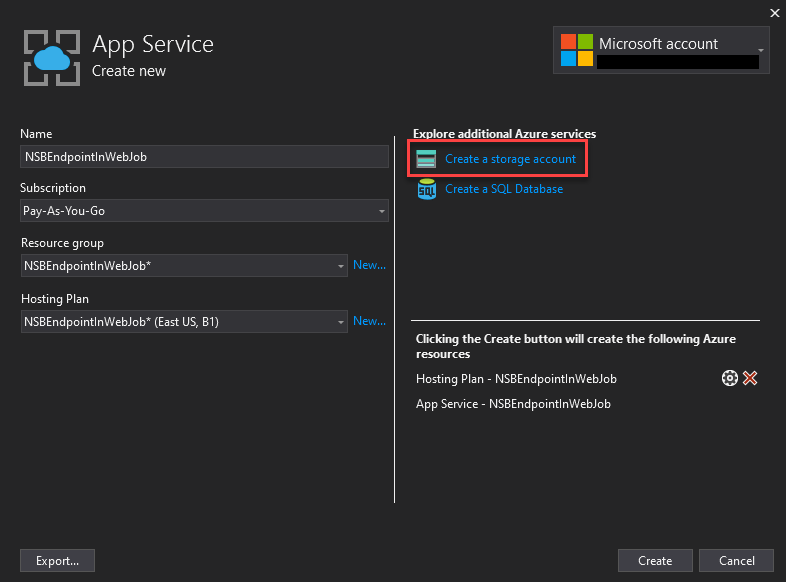
Next, click on the "Create a storage account" link
Creating a storage account gives NServiceBus an account under which to create the azure storage queues for the endpoint's transport needs. The storage account name must be globally unique within Azure (similar to the app service name), so enter your unique storage account name in the Account name field (I called mine "nsbendpointinwebjob").
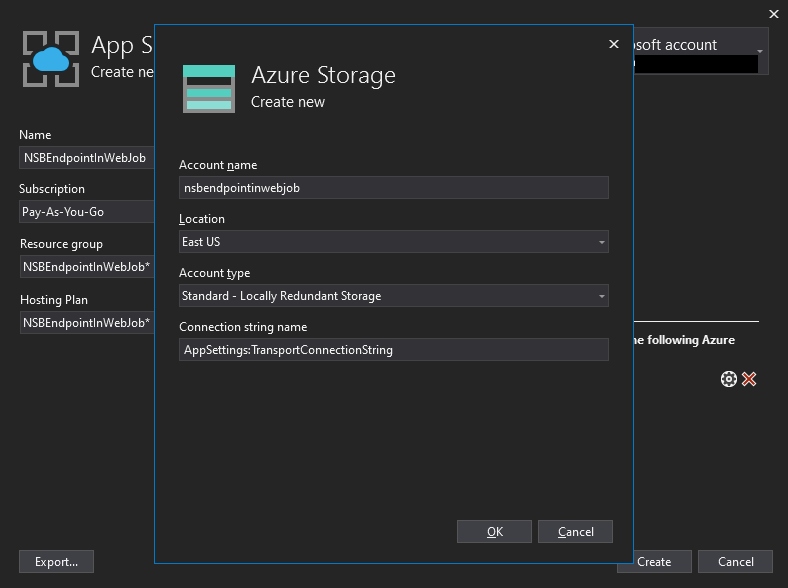
Enter the location closest to you in the Location field and keep the default Account type of "Standard-Locally Redundant Storage"
Enter "AppSettings:TransportConnectionString" in the Connection string name field. By providing a connection string name here, the storage account's connection string will be "auto-magically" placed into the app service's App Settings configuration section. When the app service's WebJob starts, and spins up the NServiceBus endpoint, the connection string will be found by our code, and NServiceBus will be able to connect to the storage account.
Click OK to close the "Azure Storage Create new" window.
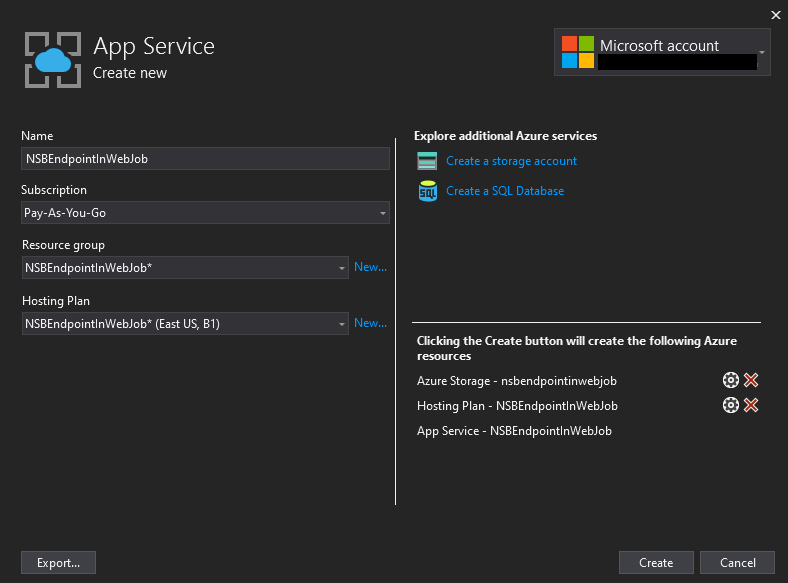
The "App Service Create new" window should now look similar to this
Everything is in place for us to publish our project to Azure App Services. Click the "Create" button. You should see a "Creating: App Service..." label and a blue ellipse appear in the lower left hand corner of the window while the Azure resources are being provisioned.

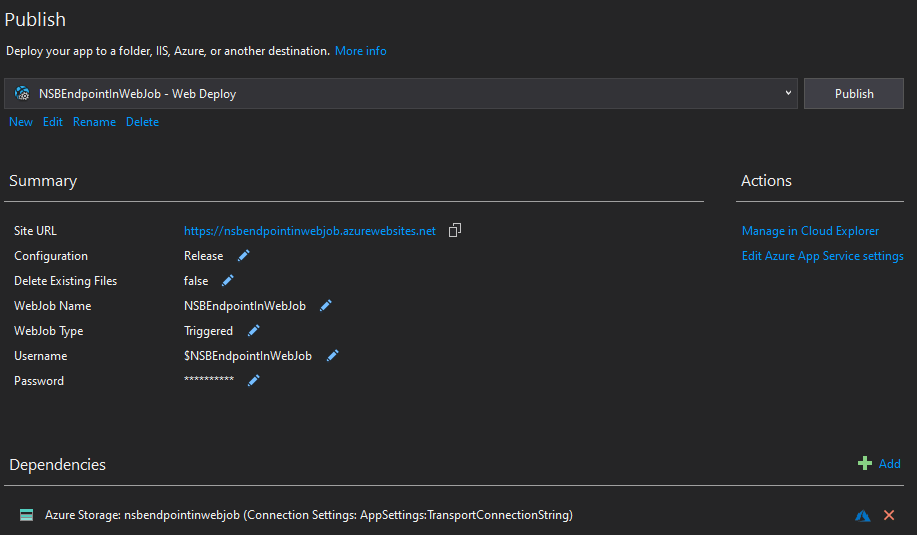
When the resources are provisioned, you'll be returned to the Publish window. It should look similar to this
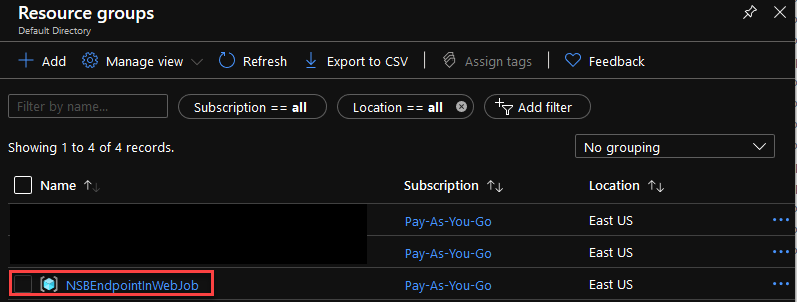
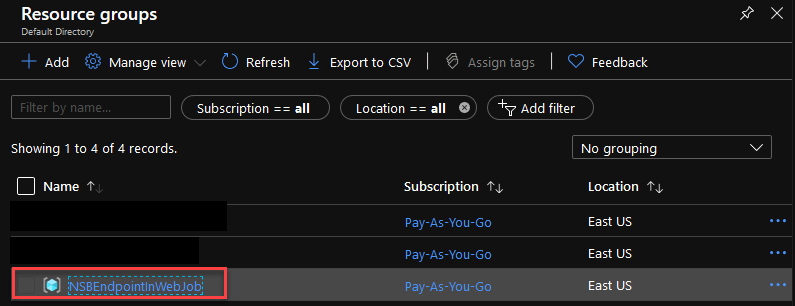
What happened in Azure while we waited for the app service to be created? Looking in the Azure Portal, you should be able to see your new resource group
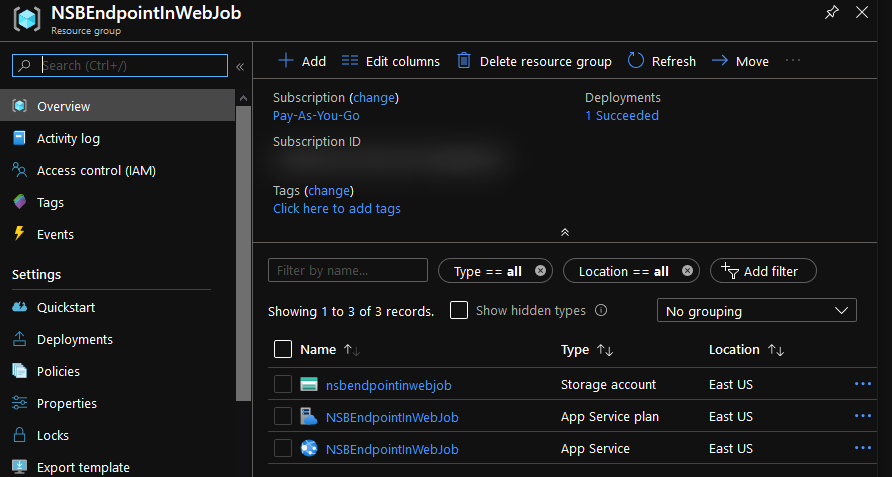
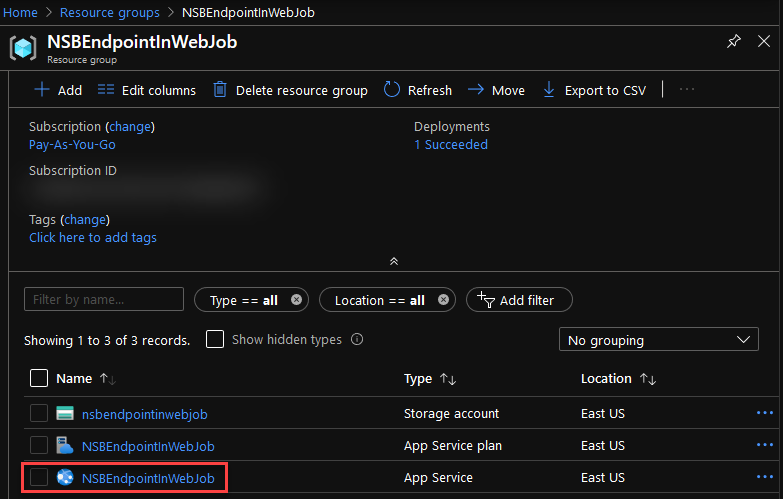
Clicking into the resource group, you should see three new resources created; the storage account, the app service plan, and the app service.
Returning to the Publish window, there is one last step we have to perform before Publishing. Click on the pencil icon by the "WebJob type" value (defaulted to "Triggered").
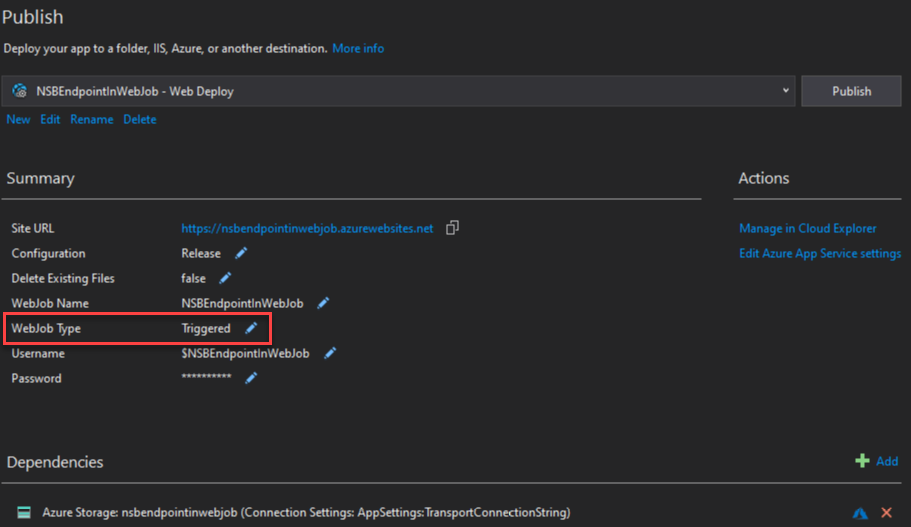
This will open the Profile Settings window. Change the WebJob type to "Continuous" and hit Save.
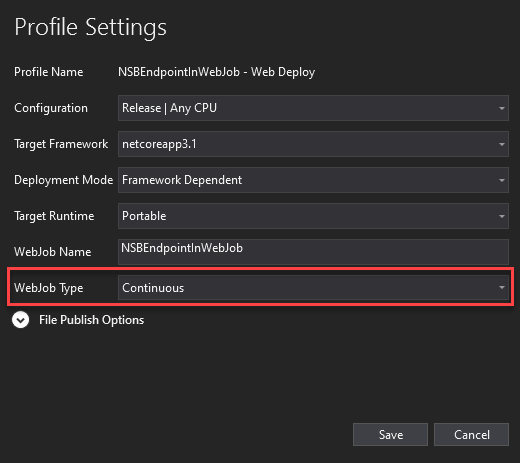
The WebJob type must be set to "Continuous" in order for it to be constantly running, which in turn, translates into our endpoint constantly running. Since our WebJob is really just a "shell" that the endpoint runs in (it's not using any WebJob-specific functionality, like triggers or binding expressions), it doesn't qualify for a "Triggered" type. Furthermore, in order for a WebJob to run in "Continuous" mode, the Azure App Service which hosts the job needs to be set to "Always On". We'll explore "Always On" later in this post.
Publish
Finally, the time has come to publish! Your settings should look similar to this
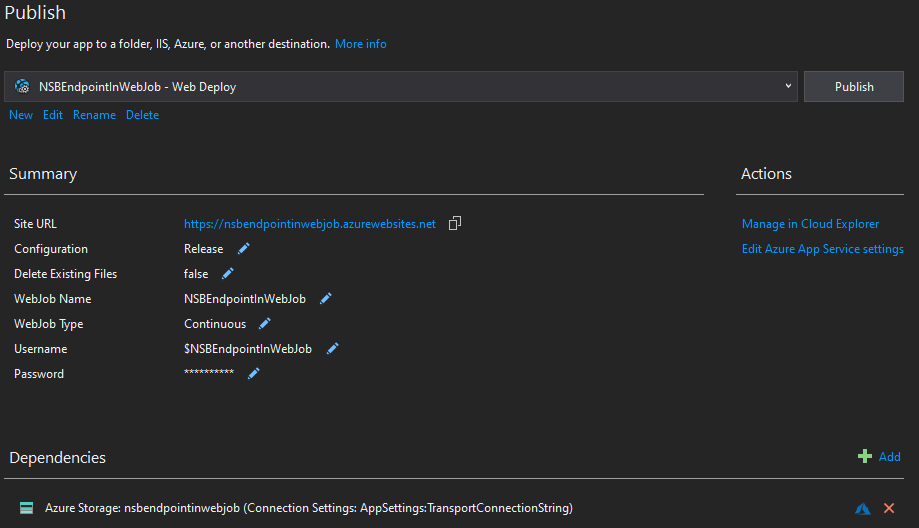
Then click the "Publish" button. The entire publish window UI will de-activate and a blue ellipse will appear next to the Publish button

You'll see a bunch of output fly by in Output window in Visual Studio
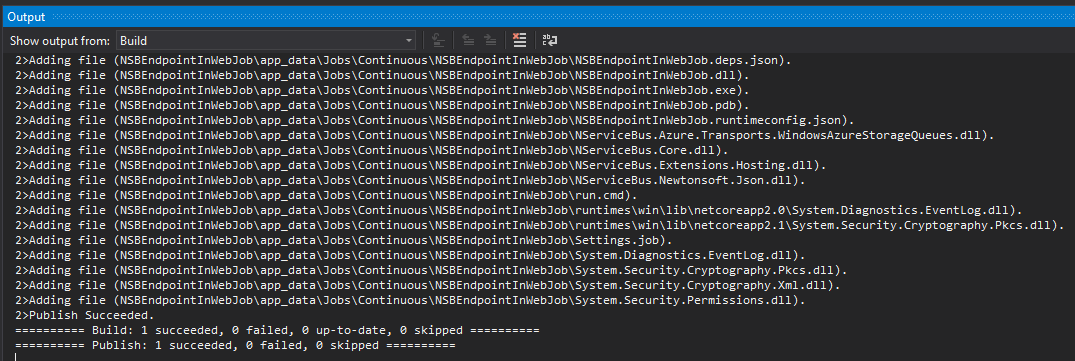
At the end of that output you should see this this message
Publish Succeeded.
========== Build: 1 succeeded, 0 failed, 0 up-to-date, 0 skipped ==========
========== Publish: 1 succeeded, 0 failed, 0 skipped ==========
You'll notice there were some items added to your project as a result of publishing. We're going to ignore those artifacts for now, as well as the ouput from the output window. We'll be unpacking all of that in Part 3.
Check the Endpoint
We've successfully published our endpoint, but we still need to check that everything is running correctly in Azure App Services.
Head over to your Azure Portal, click on the NSBEndpointInWebJob resource group
then click on your app service
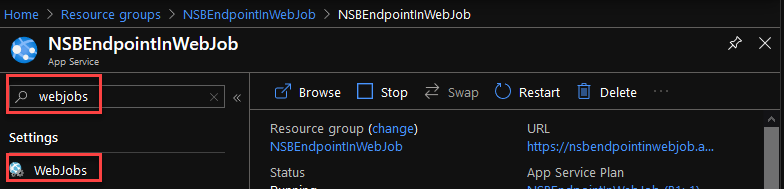
In the search field in the upper left-hand corner of the page, type "WebJobs" then click the WebJobs menu item
When the WebJobs page loads, you'll see there is a warning message being displayed

Continuous and scheduled CRON webjobs require 'Always On' to be enabled for your app.
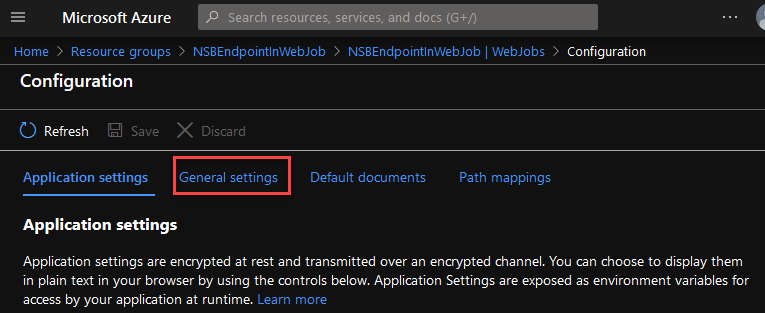
Click on the warning message link and you will be brought to the Configuration page of your app service on the Application Settings tab. Click on the General settings tab
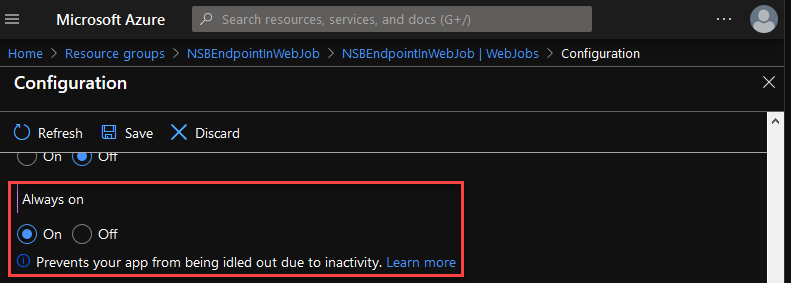
In the General setings tab, scroll down and enable "Always On"
Click the Save button at the top, then click Continue at the save changes prompt. The changes should save after a couple seconds.
Return to your app service and type "WebJobs" in the search field again, clicking on the WebJobs menu item. When the WebJob page loads you should see your WebJob in a running state.
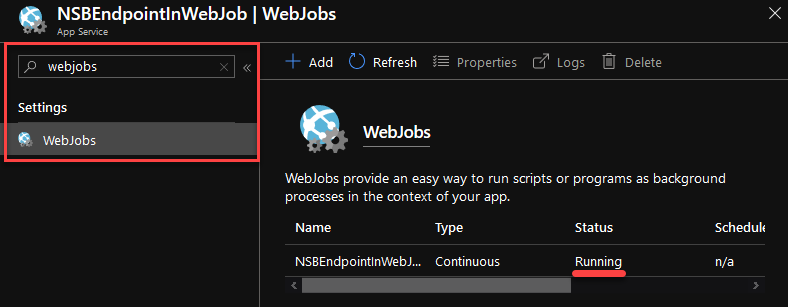
If the WebJob still shows as Stopped, do a hard refresh on your browser to bring the page up to date
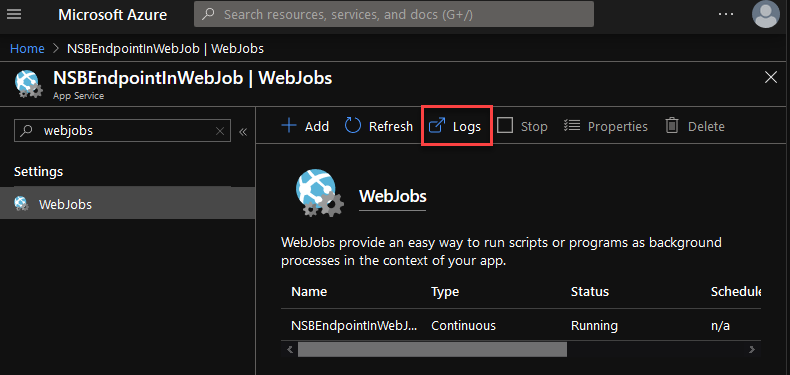
Next, click on the WebJob name, then click the "Logs" button at the top of the page.
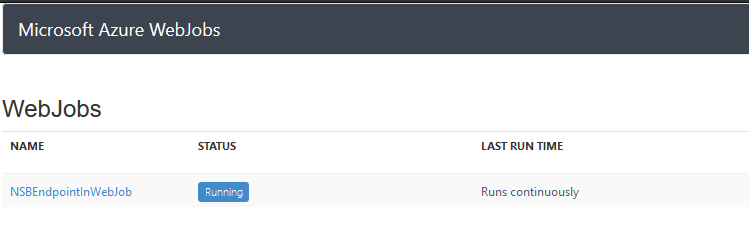
This will open a new tab... give it a couple seconds to load. You should now see a "WebJobs" page with the name of your WebJob with a status of "Running"
Click on the WebJob name which will load the output to the console. You should see your "hello ..." log output
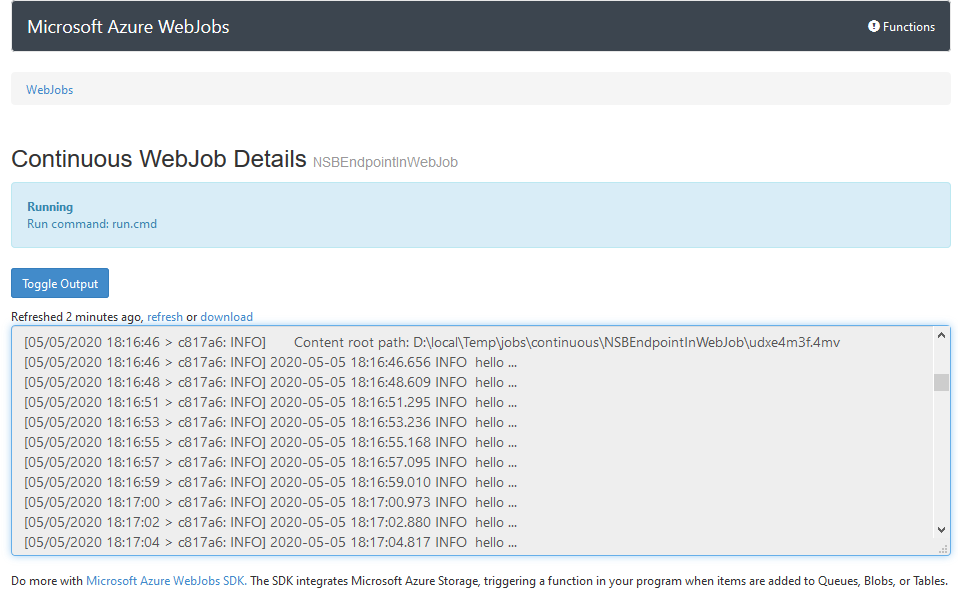
Congratulations, you have an NServiceBus endpoint running in a continuous WebJob in Azure App Services!
Cleaning Up
A continuously running WebJob in an app service set to "Always On" with a service plan on the B1 pricing tier is not going to be free, so we want to clean up all the provisioned Azure resources. Because we'll be relying on the resources for subsequent posts, we don't want to delete them (yet). Instead, we'll shut them down. To do this, we'll use Azure CLI scripts in Azure Cloud Shell instead of the Azure Portal.
Azure Cloud Shell
Azure Cloud Shell is basically "PowerShell in the Cloud". Using Cloud Shell is a quick way to run Azure CLI scripts against any Azure resource.
First, click on the Cloud Shell icon on the top of your Azure Portal window

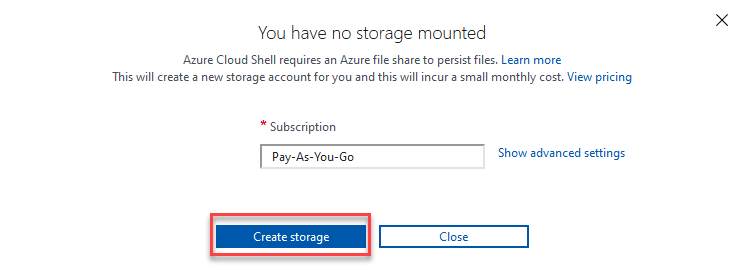
If you haven't opened Cloud Shell before, you'll see the notice below. You'll need an Azure file share to persist files if you want to use Cloud Shell. Click the "Create storage" button.
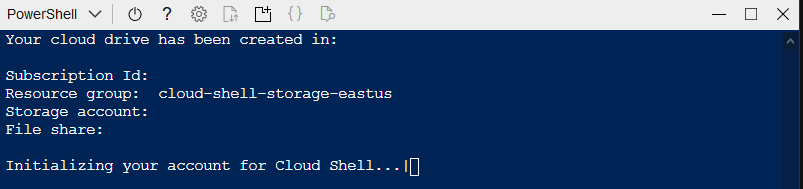
Wait for your account to initialize
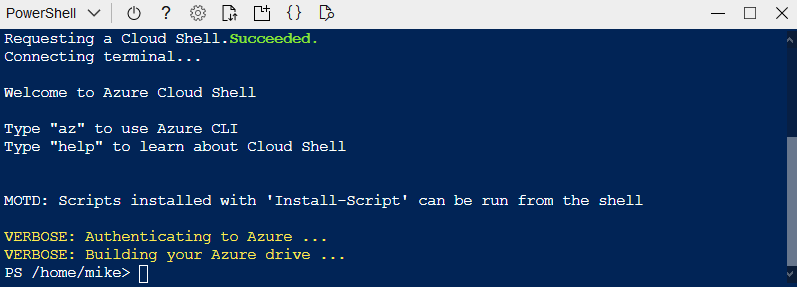
When it's done, you should see a "Succeeded" message
Now we're ready to shut down our resources.
Stop the App Service
Before we stop the app service, we have to set Always On to false. Why? We won't be able to change tha app service plan from B1 to F1 (free) with Always On set to true.
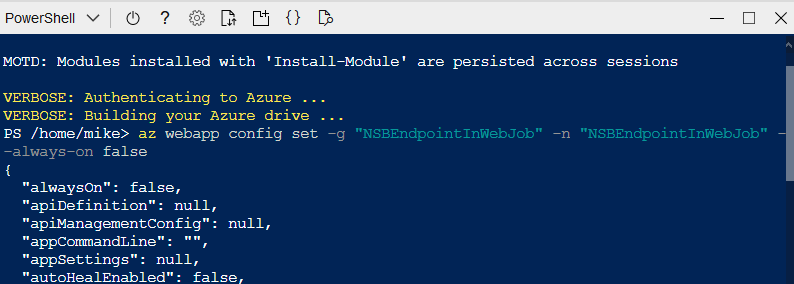
Copy and paste the following PowerShell code into Cloud Shell replacing NAME_OF_YOUR_APP_SERVICE with your unique app service name. Then hit Enter.
az webapp config set -g "NSBEndpointInWebJob" -n "NAME_OF_YOUR_APP_SERVICE" --always-on false
You will see json output after the operation succeeds which can be ignored for now
For the rest of the Azure CLI commands, I won't be providing a screen shot of the output for brevity's sake. Some Azure CLI commands allow you to decrease the verbosity of the output, other don't.
Now that we've set Always On to false, copy and paste the following PowerShell code into CloudShell replacing NAME_OF_YOUR_APP_SERVICE with your unique app service name. Then hit Enter
az webapp stop -n "NAME_OF_YOUR_APP_SERVICE" -g "NSBEndpointInWebJob"
Our app service is stopped, but service plan charges can still apply. Let's change our service plan to the free pricing tier.
Change Service Plan to F1
Copy and paste the following PowerShell code into CloudShell and hit Enter
az appservice plan update -n "NSBEndpointInWebJob" -g "NSBEndpointInWebJob" --sku FREE --only-show-errors
The app service plan is now running on the free tier. The final step is emptying the storage queues
Empty the Storage Queues
Azure charges you for anything stored in a storage account, so now that our app service is stopped, let's delete any data in the queues. We should only have data in the audit queue, as we set the NServiceBus audit queue in the endpoint configuration code for the WebJob.
Copy and paste the following PowerShell code into CloudShell replacing NAME_OF_YOUR_STORAGE_ACCOUNT with your unique storage account name. Then hit Enter
az storage message clear -q "NAME_OF_YOUR_STORAGE_ACCOUNT-audit" --account-name "NAME_OF_YOUR_STORAGE_ACCOUNT" --only-show-errors
Success! We've shut down our resources and save them for subsequent posts.
In Closing
In this post we published our NServiceBus Endpoint to an Azure App Service using Visual Studio's right-click/Publish functionality. I walked you through all the steps taken not only in Visual Studio, but in the Azure Portal to deploy and successfully run our endpoint. Finally, we cleaned up our provisioned resources, and put them into "hibernation" so we have them in place for subsequent posts.
In Part 3, we're going to unpack the work being done behind the scenes by Visual Studio's publish functionality so we can gain a better understanding of what we'll need to do on our own when we move towards building and deploying the NServiceBus endpoint using Azure DevOps (Part 4).