

Photo by Eric Rothermel on Unsplash
This is part of an ongoing series of posts revolving around Humanitarian Toolbox’s allReady open source project. Part of working on this open source project is getting exposure to ASP.NET Core, EF Core and a host of other open-source frameworks as well as working with contributors around the world to build out this disaster relief site.
Recently, allReady had a requirement to schedule, at certain intervals relative to a fixed date, sms messages that were to be sent to people who requested services from our site. An example of a request would be a smoke alarm installation.
When the messages were received, the requestor’s could confirm or cancel their request, and our system would track their response. If the requestor did not respond to us at all 7 days before the requested service, they would receive another sms messages asking them to confirm or cancel, then 1 day before, and finally, the day of.
Since allReady is built to run anywhere in the world, we couldn’t just build an Azure WebJob that would check the database once a day at 12 noon and send out sms messages because 12 noon is relative to what time zone you’re in.
The last thing we wanted to do was send out sms messages at 1 or 2 am (people tend to get mad about this type of intrusion, and rightfully so). What we needed was a way to schedule these outbound sms messages to the requestor’s phone at 12 noon local time.
After looking at a couple open source scheduling frameworks, I decided upon a scheduling framework calling Hangfire
Why Hangfire?
Hangfire, right out of the box had some nice features:
- the ability to “enqueue” jobs (aka, “Fire and Forget”)
- the ability to schedule Recurring jobs
- the ability to schedule Delayed jobs
What caught my eye was the third item in the list, the ability to schedule delayed jobs. When a request was assigned to something called an Itinerary our system, we had following scheduling rules:
- send an initial sms to the requestor asking them to confirm or cancel the Request.
- if the requestor has not confirmed or canceled the Request 7 days before the Itinerary date, send them another sms confirmation message.
- if the requestor has not confirmed or canceled the Request 1 day before the Itinerary date, send them another sms confirmation message.
- if the requestor has not confirmed or canceled the Request the day of the Itinerary date, send them an sms saying we’ll catch them next time (in other words, we’re not showing up to service the Request).
So I set out to build a “pipeline” of scheduled tasks based on the days when the messages should go out per request.
It seemed like creating a delayed job in Hangfire was exactly what we needed. I download the nuget packages for Hangfire and got started.
Hangfire Basic Concepts
Hangfire is divided into three components.
- The first component is the Hangfire client, which is responsible for creating jobs by serializing a class’s method and that method’s arguments to JSON. This can be done using the members on BackgroundJobClient class, or its abstraction, the IBackgroundJobClient interface.
- The second component is Job Storage, which is responsible for storing the serialized JSON to the configured job storage (sql server by default).
- The third component is the Hangfire Server. This component is responsible for pinging the job storage every 15 seconds to see if there are outstanding jobs to be processed. If there are, it deserializes the stored job into the class/method/args that should be invoked and executes them.
I wanted to go with an “out of the box” approach to using the framework to start. This is what we get out of the box with Hangfire:
- Sql Server job storage
- the Hangfire server runs under IIS process
- serializes a class’s method to be called, along with the parameters for that class in job storage
- once you call any of the Hangfire methods, you immediately free up the calling thread to return to the caller.
- Hangfire handles exceptions and retries for you based on a configurable retry number
Hangfire Setup
Setting up Hangfire was relatively simple, I downloaded the following NuGet packages to our ASP.NET Core web project (v 1.6.6 as of this blog post):
- Hangfire.AspNetCore
- Hangfire
- Hangfire.Core
- Hangfire.SqlServer
- Hangfire.Autofac (v 2.2.0 as of this blog post)
Hangfire did try to create a helper class for wiring up Hangfire via OWIN, but I had to delete that file, because it was not meant to be used by ASP.NET Core. Seeing how there were no ASP.NET Core startup classes to help me, I turned to the GitHub project and found this:
https://github.com/HangfireIO/Hangfire/pull/604
It was in this PR that I finally saw some examples of how to wire up Hangfire in ASP.NET Core’s Startup.cs class. Here is a quick overview of what I had to change to get Hangfire up and running.
The ConfigureServices Method
services.AddHangfire(configuration => configuration
    .UseSqlServerStorage(Configuration["Data:HangfireConnection:ConnectionString"]));
We’re telling Hangfire to use sql server job storage (the default) and passing in our connection string stored in config.json.
containerBuilder.Register(icomponentcontext =>
    new BackgroundJobClient(new SqlServerStorage(Configuration["Data:HangfireConnection:ConnectionString"])))
    .As<IBackgroundJobClient>();
Here we are registering a BackgroundJobClient to be created for every injected instance of IBackgroundJobClient. This is how to wire up dependency injection of BackgroundJobClient via IBackgroundJobClient when you want to make a call in your code to enqueue a Hangfire job.
Note again here we need to provide the connection string to a new instance of SqlServerStorage and pass that to the BackgroundJobClient.
The Configure Method
app.UseHangfireDashboard("/hangfire", new DashboardOptions
{
    Authorization = new [] { new HangireDashboardAuthorizationFilter() }
});
app.UseHangfireServer();
Here we configure the the Hangfire Dashboard and then start the Hangfire Server. When the Hangfire Server starts, it will look for its configured database, then check that database for the Hangfire schema. If the schema does not exist, it creates the schema.
What the heck is a Hangfire Dashboard?
The Hangfire Dashboard
The Hangfire Dashboard is a nifty dashboard that comes with the framework that allows a user to see information about enqueued, completed and failed jobs. It also provides performance metrics.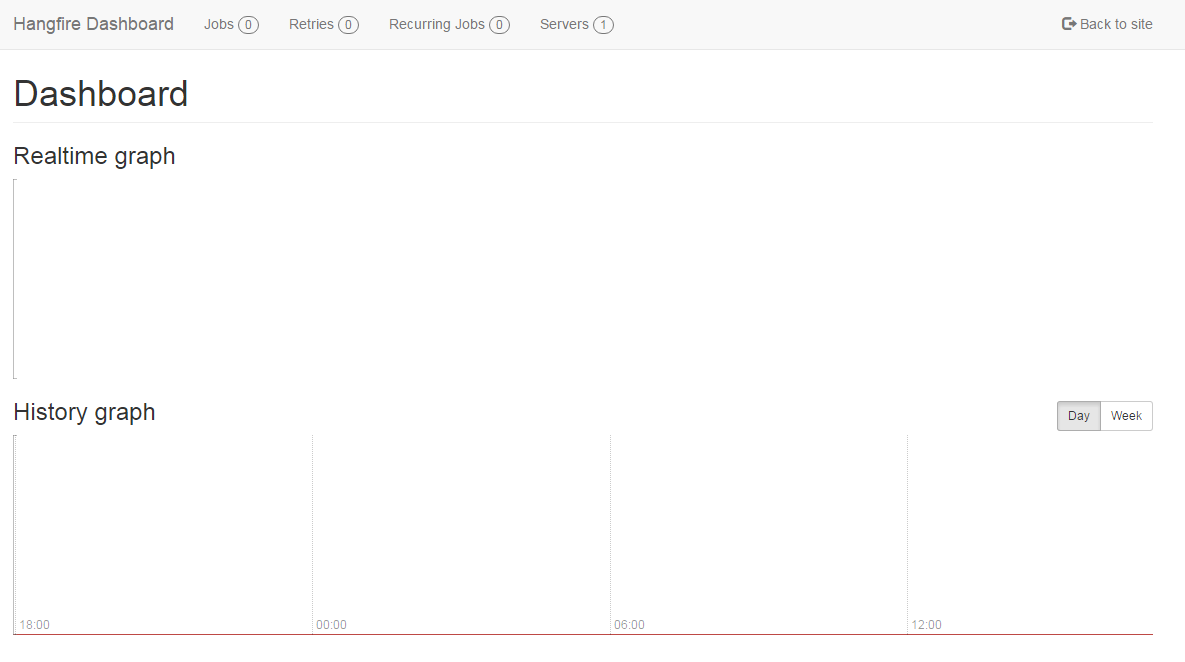 ](GHOST_URL/content/images/20
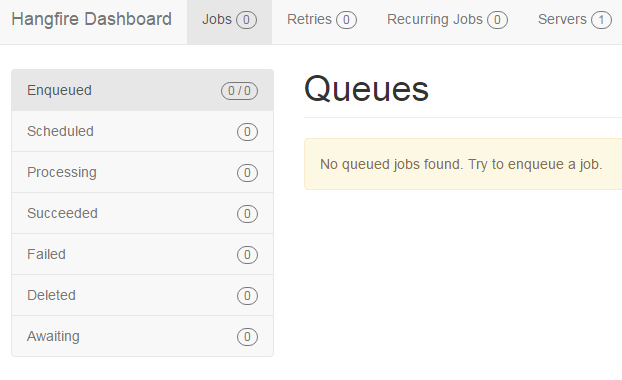 ](GHOST_URL/content/images/2016/11/hangfirejobs.png)
some other notable arguments being passed to the .UseHangfireDashboard() method are:
/hangfire: - this is the route from which you want the Hangfire Dashboard to be accessible. It’s configurable, like most other things in Hangfire, but I just stuck with the defaults.new DashboardOptions { Authorization = new [] { new HangireDashboardAuthorizationFilter() }}:- you configure Hangfire dashboard authorization by setting the Authorization property on DashboardOptions. Without authorization explicitly set, anyone will be able to head to that route and view your dashboard (probably something you want to keep from happening). In this case, I wrote a simple implementation of IDashboardAuthorizationFilter in the HangireDashboardAuthorizationFilter class and tied into our user claims to authorize access.
NOTE: make sure you call .UseHangfireServer() before you hook into app.UseMvc(routes => … or you will not be able to access your Hangfire server at the path you supplied to .UseHangfireDashboard().
Database Setup
One final setup item. Hangfire will not create the database you’ve specified in the Hangfire connection string for you. You can to create the database by hand (or via script) but it is not something the framework does.
This is something I did find a little annoying at first, because Hangfire can take of creating its schema in its database if it does not exist, but it will not create a database for you.
For allReady, we eventually ended up creating the schema under our EF-managed database because we did not want to force a separate database on local developers or not have the option to host the schema in our main database. I’ll show more on how we did this in the last section, “Hangfire Customization Outside the “Default” Settings”.
Hangfire Usage
Now that we’ve taken care of wiring up Hangfire in Startup.cs and have created the database that our Hangfire connection string points to, it’s time to F5 and start playing with Hangfire.
The first time Hangfire starts, it will create its schema if it does not already exist 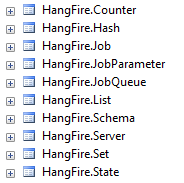 ](GHOST_URL/content/images/2016/11/hangfireschema.png)
If you see this schema created in the database you’ve provisioned and you can access the Hangfire dashboard, then you’re set to get started
Enqueue’ing Your First Job
Earlier I mentioned how we could wire up Hangfire to inject the IBackgroundJobClient into a class to create a new job. Again, Hangfire has multiple job “types”, the simplest of which is created via the Enqueue method:
public class TestHangfireController : Controller
{
    private readonly IBackgroundJobClient backgroundJob;

    public TestHangfireController(IBackgroundJobClient backgroundJob)
    {
        this.backgroundJob = backgroundJob;
    }

    public IActionResult Index()
    {
        backgroundJob.Enqueue(() => Debug.WriteLine("Background Job completed successfully!"));
        return RedirectToAction("Index", "Home");
    }
}
Here we’ve created a TestHangfireController that takes IBackgroundJobClient as a dependency. We call the Enqueue method on the job client and pass it a lambda. In this case, the lambda is very simple and will just print a message to our output window.
Enqueue pretty much executes a job immediately (by enqueue’ing a job to its queue). Running locally, I could not catch the enqueue’d job in the Hangfire Dashboard’s Enqueue’d Job section at all it ran so quickly. However, I could see that the job processed successful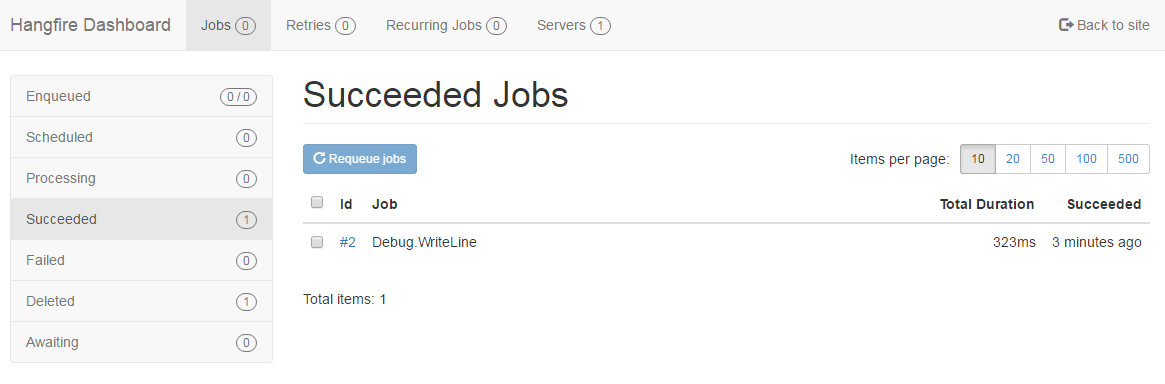 ](GHOST_URL/content/images/2016/11/hangfiresuccessfullyexecuteenqueudjob.png)
If you click on the Job id (#2 in this case), you can see what information was serialized by Hangfire and then executed when the server de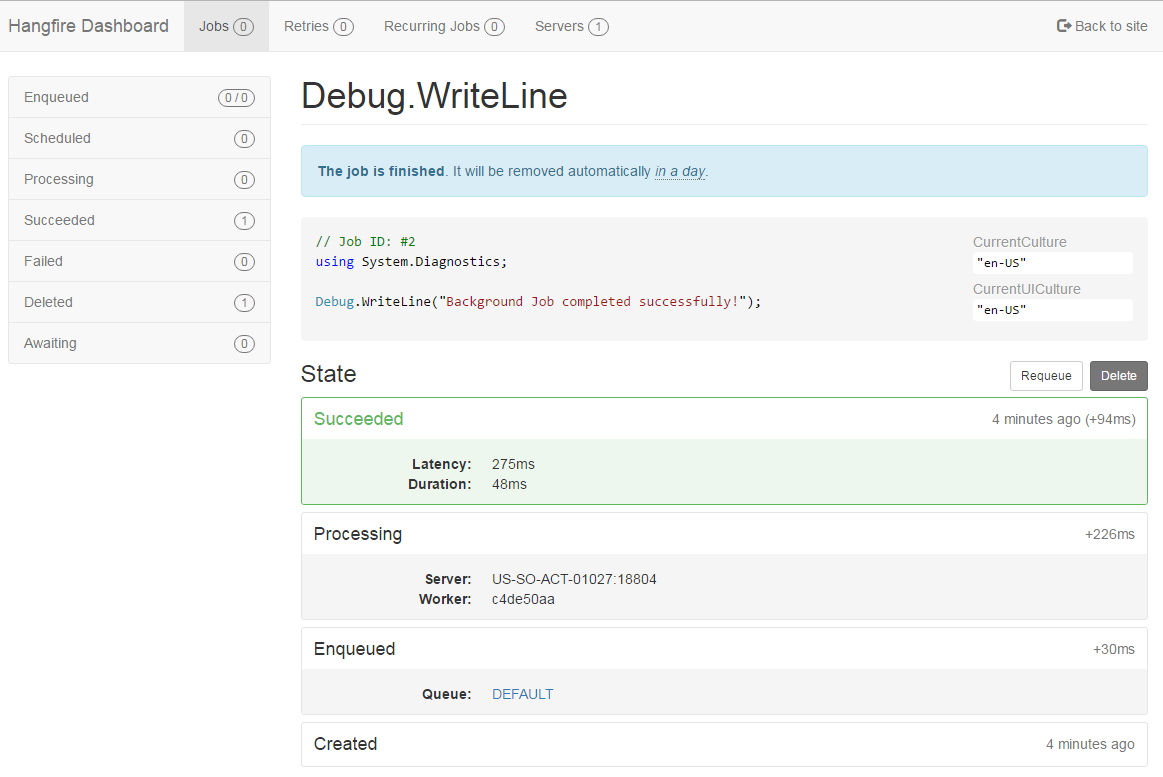 ](GHOST_URL/content/images/2016/11/hangfiresuccessfullyexecuteenqueudjobdetails.png)
So if we want to execute code right away, why use Hangfire at all?
As I mentioned earlier, one of the benefits for using Hangfire is once you invoke a job method off of the job client, it immediately returns the control of the thread to the calling client (in this case, it’s our UI). This is really useful when you have to call code that might take awhile, yet you don’t want to keep your caller waiting.
A great example of this is returning an acknowledgement from a WebApi controller’s action method that was invoked by a RPC-based web request. Another good example would be receiving an incoming post form a service like Twilio.
You don’t want to keep your callers waiting unless you absolutely have to.
Scheduling Your First Job
Now that you understand Enqueue and why you’d want to use it, let’s look at scheduling a job using Hangfire. Returning to our TestHangfireServerController, here is some code to schedule a job 5 seconds from “now”.
public class TestHangfireController : Controller
{
    private readonly IBackgroundJobClient backgroundJob;

    public TestHangfireController(IBackgroundJobClient backgroundJob)
    {
        this.backgroundJob = backgroundJob;
    }

    public IActionResult Index()
    {
        backgroundJob.Schedule(() => Debug.WriteLine("Scheduled Job completed successfully!"), TimeSpan.FromSeconds(5));
        return RedirectToAction("Index", "Home");
    }
}
Again, we’re writing a message to our output window, but this time, we’re using the Schedule method off the job client. You’ll see the Schedule method requires not only a lambda that represents the job to execute but, either a DateTimeOffset or a TimeSpan that will tell the Hangfire Server when we want it to execute this job.
Running this code and them jumping over to the Hangfire Dashboard shows our scheduled jo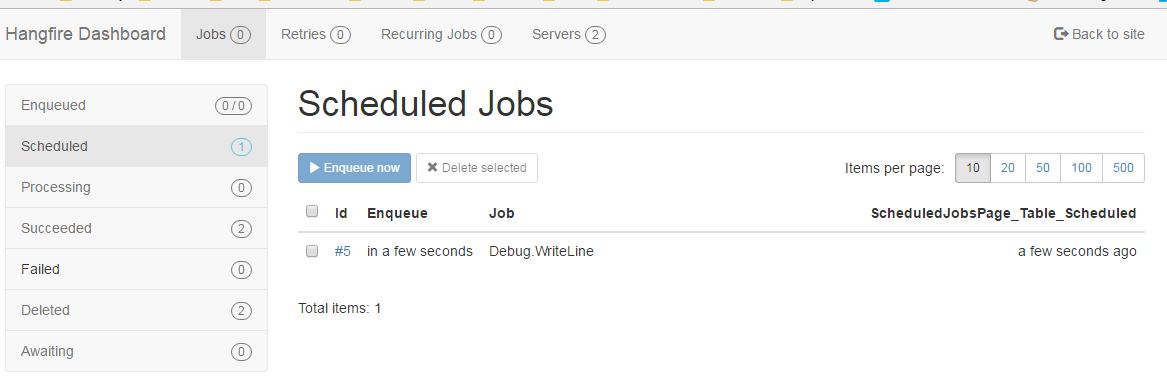 ](GHOST_URL/content/images/2016/11/hangfirescheduledjob1.png)
Clicking into the details you can see the serialized job ready to be executed when the server picks it up off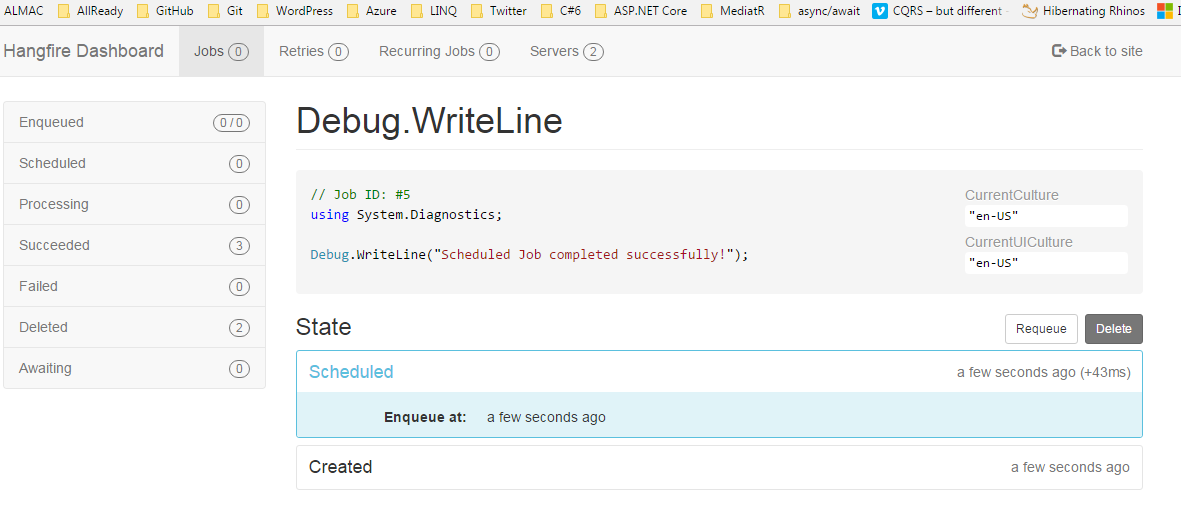 ](GHOST_URL/content/images/2016/11/hangfirescheduledjobdetails.png)
And, when 5 seconds are up, it executes the job and moves it to 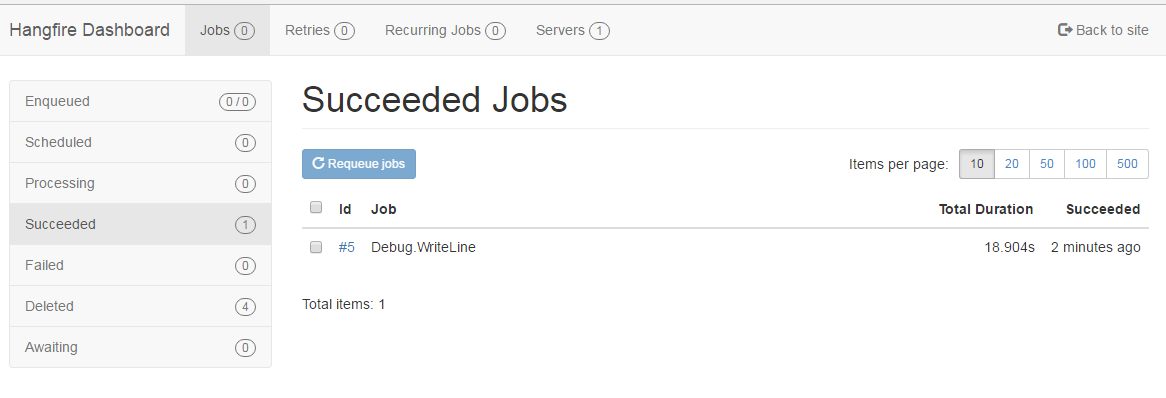 ](GHOST_URL/content/images/2016/11/hangfirescheduledjobsucceeded.png)
That’s how simple it is to schedule jobs in Hangfire. And simple is good.
But you probably want to do more than print text to your output window in your application, so let’s see how we’d go about scheduling a job that invokes a class method that sends sms messages to requestors and relies on outside dependencies .
Scheduling a Job Which Requires Dependencies
Earlier I had outlined how allReady is using scheduled Hangfire jobs to send sms messages to requestors to either confirm or cancel their request for a service (for this example, let’s assume they requested a smoke alarm install).
In order to do this, the job I want to run has to do a couple things:
- check the database to make sure all RequestIds that have been serialized on the job have not already been confirmed. We don’t want to send a confirmation reminder to a requestor who has already confirmed their request.
- check the database to grab the end date of the Itinerary that the Request has been added to and make sure at the point our job is running, that the date has not already passed. If it has already passed, we don’t want send sms messages, but we still want to schedule the next sms reminder job.
- use an
ISmsSenderabstraction to send the sms messages to each requestor - use the
IBackgroudjobClientabstraction to invoke the .Schedule method in order to schedule the next job in the pipeline
Let’s break the job class down into pieces. First, the interface, implementing class and its dependencies:
public interface ISendRequestConfirmationMessagesAWeekBeforeAnItineraryDate
{
    void SendSms(List<Guid> requestIds, int itineraryId);
}

public class SendRequestConfirmationMessagesAWeekBeforeAnItineraryDate : ISendRequestConfirmationMessagesAWeekBeforeAnItineraryDate
{
    private readonly AllReadyContext context;
    private readonly IBackgroundJobClient backgroundJob;
    private readonly ISmsSender smsSender;

    public SendRequestConfirmationMessagesAWeekBeforeAnItineraryDate(
        AllReadyContext context,
        IBackgroundJobClient backgroundJob,
        ISmsSender smsSender)
    {
        this.context = context;
        this.backgroundJob = backgroundJob;
        this.smsSender = smsSender;
    }
}
The purpose of this scheduled job is to send confirmation messages (sms messages) a week before the itinerary date. We have an interface that represents the contract of this job and the class that implements it. You can see we’re injecting an EF context (AllReadyContext), an abstraction of our SmsSender (ISmsSender) and Hangfire’s IBackgroudjobClient, so we can schedule the next job in the pipeline (ISendRequestConfirmationMessagesADayBeforeAnItineraryDate) after we send our sms messages.
here is the SendSms method:
public void SendSms(List<Guid> requestIds, int itineraryId)
{
    var requestorPhoneNumbers = context.Requests
        .Where(x => requestIds.Contains(x.RequestId) &&
        x.Status == RequestStatus.PendingConfirmation).Select(x => x.Phone).ToList();
    if (requestorPhoneNumbers.Count > 0)
    {
        var itinerary = context.Itineraries.Single(x => x.Id == itineraryId);

        if (TodayIsEqualToOrGreaterThanSevenDaysBefore(itinerary.Date))
        {
            smsSender.SendSmsAsync(requestorPhoneNumbers,
                $@"Your request has been scheduled by allReady for {itinerary.Date.Date}. Please response with ""Y"" to confirm this request or ""N"" to cancel this request.");
        }

        backgroundJob.Schedule<ISendRequestConfirmationMessagesADayBeforeAnItineraryDate>
        (
            x => x.SendSms(requestIds, itinerary.Id), OneDayBefore(itinerary.Date)
        );
    }
}
You can see why we need all the dependencies.
What this method is doing is making sure we don’t end up sending another sms message to a requestor that has already confirmed their request in our system. We then check to make sure 7 days before the Itinerary date has not already passed. If the code is executing seven days or more before the itinerary date, we send our sms messages out and finally, schedule our next job (for one day before the Itinerary date) to send our next batch of confirmation messages.
NOTE: Hangfire WILL execute jobs that are in the past, which is why we need to make sure the “now” of this job executing is still meeting the expectations of the class, which is to send messages seven days before the Itinerary’s end date. We’ll talk more about this in “Coding Asynchronously and Understanding the Trade-offs”
But how is this job scheduled? After all, something scheduled it to execute 7 days before the Itinerary’s end date.
public class InitialRequestConfirmationsSentHandler : IAsyncNotificationHandler<InitialRequestConfirmationsSent>
{
    private readonly AllReadyContext context;
    private readonly IBackgroundJobClient backgroundJob;

    public InitialRequestConfirmationsSentHandler(AllReadyContext context,
        IBackgroundJobClient backgroundJob)
    {
        this.context = context;
        this.backgroundJob = backgroundJob;
    }

    public async Task Handle(InitialRequestConfirmationsSent notification)
    {
        var requests = await context.Requests
            .Where(x => notification.RequestIds.Contains(x.RequestId)).ToListAsync();
        requests.ForEach(request => request.Status = RequestStatus.PendingConfirmation);
        await context.SaveChangesAsync();

        var itinerary = await context.Itineraries
            .SingleAsync(x => x.Id == notification.ItineraryId);

        backgroundJob.Schedule<ISendRequestConfirmationMessagesAWeekBeforeAnItineraryDate>
        (
            x => x.SendSms(notification.RequestIds, itinerary.Id),
                SevenDaysBefore(itinerary.Date)
        );
    }

    private static DateTime SevenDaysBefore(DateTime itineraryDate)
    {
        return itineraryDate.Date.AddDays(-7).AtNoon();
    }
}
InitialRequestConfirmationsSentHandler is executed via a CQRS framework allReady uses called MediatR. This code represents a handler for a notification we broadcast in our system. In this case, it means that we’ve send the initial sms messages to all requestors after the requests were added to the Itinerary.
Since all the initial sms messages have been sent, this handler updates the status of the Requests appropriately, then schedules the ISendRequestConfirmationMessagesAWeekBeforeAnItineraryDate job seven days before the Itinerary’s end date.
There is one more thing we have to look at. Unfortunately Hangfire does not register all its job interfaces with their corresponding implementations, we have to do that by hand. In our Startup.cs class we register all three jobs
services.AddTransient<ISendRequestConfirmationMessagesAWeekBeforeAnItineraryDate, SendRequestConfirmationMessagesAWeekBeforeAnItineraryDate>();
services.AddTransient<ISendRequestConfirmationMessagesADayBeforeAnItineraryDate, SendRequestConfirmationMessagesADayBeforeAnItineraryDate>();
services.AddTransient<ISendRequestConfirmationMessagesTheDayOfAnItineraryDate, SendRequestConfirmationMessagesTheDayOfAnItineraryDate>();
Auto registration is probably possible using assembly scanning and Autofac, but to keep it simple (and because we only have three scheduled Hangfire jobs in our system), we register them by hand.
Building out an auto-registration feature would be useful if you’re relying on Hangfire to run most of the code in your system.
The Trade-offs of Asynchronicity
As you’ve seen, we’ve had to write some code for the asynchronous nature of Hangfire scheduled jobs. These are “gotchas” waiting for you if you don’t really think about how jobs are scheduled, stored and executed.
Hangfire Executes Scheduled Jobs That Are in the Past
Hangfire immediately executes scheduled jobs that are in the past. A lot of people see this as a bug, but it’s really not when you think about eventual consistency.
Why is the scheduled job executing in the past? Hangfire should have executed it at the point it was scheduled. One possible scenario is the Hangfire server was down/offline for a length of time. Just because those scheduled jobs are in the past when the server comes back online does not mean they should not be run.
Remember, these serialized jobs represent business data at a point in time in your system. If the Hangfire server were to dismiss theses jobs (or even worse, delete them!), you would be losing valuable business data, and worse, not executing what should have been executed on that business data.
If you need to account for a job executing when it’s in the past, you’ll need to explicitly write code for it.
Idempotency
We need to think about making our job code idempotent. Because Hangfire retries jobs that throw an exception, you need to think about the code in your job executing more than once if an exception is thrown.
You’ll notice that some of my job code above is not idempotent. For example, I’m not recording each RequestId and whether or not I’ve sent the 7, 1 or day-of sms confirmation message to them, and I should be.
Because I’m not storing this information, I could potentially send the same sms reminder to the same requestor more than once if my job were to throw an exception and the job code retried. All I can say is I should be working on fixing that, but I’m currently writing this blog instead 😉
That will be my next PR.
Evolving API’s
Another thing to take into consideration is changes in a job’s API. Usually, code does not get written and not change, so at some point, you might need to change the signature on a Hangfire-executed class method.
For example, let’s say we need to pass another parameter to the SendSms method on any of our job types. We change this:
public void SendSms(List<Guid> requestIds, int itineraryId)
to this:
public void SendSms(List<Guid> requestIds, int itineraryId, string userId)
Now we push that code to our production server while there still pending scheduled jobs for the old version. The Hangfire server will throw an exception because it can no longer deserialize the job based on the current API definition.
To get around this problem, you need to keep the old API intact until you’re sure all scheduled jobs for the old API have been processed. Then you can delete the old API.
This is a lot of extra stuff to think about! It’s making me write more code! You’re correct, it’s more work, but look again at what we get from Hangfire:
- true fire and forget job execution that immediately releases the thread back to the caller.
- the ability to schedule jobs for future execution, and an entire framework that allows you to plug in dependencies and create 100% unit testable job code. Go ask your sys admins insisting on Windows Scheduler to do that.
- automatic (and configurable) retries to get around transient errors that would land other code in hot water
Remember, it’s all about the trade-offs 😉
Hangfire Best Practices
There are some Hangfire best practices that are recommended.
Make Job Arguments Small and Simple
It’s very easy to pass a large, complex object as an argument to a method of a class that is to be serialized by Hangfire for execution. Best practice is to store only primitives (unique id’s are best), then do the database calls you need in the job code to get the information you need to do the work in the job.
Remember, for every type of job, Hangfire has to incur the overhead of serializing the job to storage, then deserializing the job to execute it. By keeping it simple and passing primitives only, you are optimizing Hangfire for speed, and not introducing a bunch of temporal coupling in your code.
Run the Hangfire Server in a Separate Process
By default, Hangfire runs under the IIS process. Although this is a good way to start, Hangfire recommends running the Hangfire Server in a separate process.
There are instructions in Hangfire’s docs on how to do this running in a console app or as a Windows Service. Hangfire recommends you do this to free the thread that will be used exclusively by the Hangfire server when running under the IIS process. It’s better to have that thread in play to service HTTP requests. UPDATE: based on a comment submitted by the author of Hangfire, Sergey Odinokov, this is actually how threads are utilized when running under the IIS process:
Hangfire doesn’t use the thread pool threads to not to compete with request processing. All the processing is held in custom threads, so you can forget about this problem.
Thanks for the correction Sergey!
Another other nice side-affect of this decision is it makes it much easier to scale out by adding multiple Hangfire Servers picking requests up off the same job storage.
If you are running Hangfire in the IIS process, make sure you set your IIS application to “always running”. If you’re hosting in Azure, in addition to making sure your IIS application is “always running”, make sure the Azure Web Applications “always 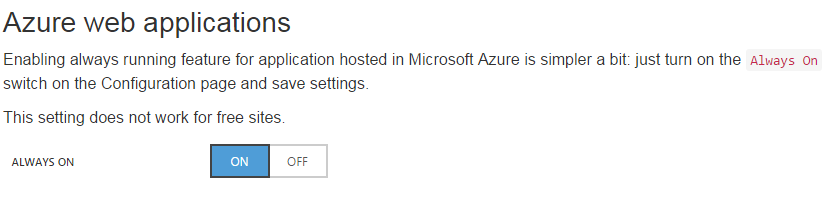 ](GHOST_URL/content/images/2016/11/azurewebappssettoalwayson.png)
Hangfire Customization Outside the “Default” Settings
There was one customization we made for allReady outside the default settings for Hangfire, to host the Hangfire schema in our main EF-controlled database instead of hosting the Hangfire schema in a separate Hangfire database. We had these reasons:
- developers would not have to worry about creating a Hangfire database locally before the stood the project up for the first time
- to address the item above, my initial approach was to include some ADO.NET code in Startup.cs to look for a local Hangfire database, and if it didn’t exist, create it. But, for developers that are not working off of a Windows machine that could not run SqlServerExpress (for example, they might be hosting a remote database on Azure and point their connection string to that database), this would not work. It was easier to move the Hangfire schema under the EF created database
- we could allow other environments to make a call about whether or not to create a separate Hangfire database based on that environments needs, rather than forcing a single model on the whole solution. This was accomplished by keeping two separate connection strings in our system, one for our EF-controlled database, and one for Hangfire. Logically, they were “separate”, but physically, we could do what we wanted.
We did run into one snag in Startup.cs when setting this up, and it had to do with calling:
app.UseHangfireDashboard("/hangfire", new DashboardOptions
{
    Authorization = new [] { new HangireDashboardAuthorizationFilter() }
});
app.UseHangfireServer();
before calling:
context.Database.Migrate();
We had to force the creation of the database via the .Migrate call BEFORE we could call the .UseHangfireServer() method when using a connection string for Hangfire that pointed to the EF controlled database.
So, our code changed to this:
context.Database.Migrate();
app.UseHangfireDashboard("/hangfire", new DashboardOptions
{
    Authorization = new [] { new HangireDashboardAuthorizationFilter() }
});
app.UseHangfireServer();
And everything worked fine.
It might seem like common sense, but there were no directions on how to accomplish this online, and I wanted to show how we did it.
Future Enhancements
In addition to aligning allReady’s usage of Hangfire with all best practices, I’d also like to move away from a polling approach (Hangfire Server polling the sql storage every 15 seconds to see if there are any jobs to process) to a push-based approach using Azure Service Bus Queues.
There is already a nuget package for it here:
https://github.com/HangfireIO/Hangfire.Azure.ServiceBusQueue
I might get a chance to play around with it, but it’s not something we need for our initial launch
Summary
In summary, we walked through how to download, configure, and use Hangfire to execute jobs using the Enqueue and Schedule methods. Along the way, we learned about some gotchas with how asynchronous operations dictates how you should write your code and learned about some Hangfire best practices at the end…. all using ASP.NET Core.